Download the XAMPP latest software for windows.


Click on "Lets go!" and it will redirect you to the next configuration page.

Enter database name, username, password , database host and table prefix.
Use default configuration.
database name- mysql
username- root
Leave password blank
database host- localhost
table prefix- wp_
Fill as above given and click on "Submit" button.

Click on "Run the install".

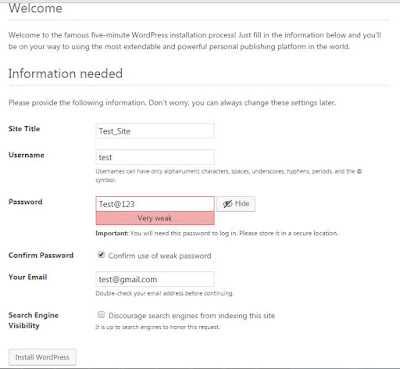
Enter the Site title, username, password, email etc as below.
Site title- Enter any title like test etc.
Username- choose any username.
Password- use and password with uppercase and numeric fields.
Note- this username and password will use for wp-admin
Then click on "Run Install" button.
:- Post your comments below if you find this helpful.👎👎
Install XAMPP using simple steps.


Open XAMPP and run Apache and Mysql.
Note- Please close those application use port 80 and 443 (Skype, IIS) as XAMPP has required it. you cannot install XAMPP on that system where you already using these ports.

Now download Wordpress, extract the same and put it into "C:\xampp\htdocs" directory.
Edit C:\xampp\htdocs\index.php with notepad++ and change in below line.
header('Location: '.$uri.'/dashboard/');
to
header('Location: '.$uri.'/wordpress/');
Type "localhost" in browser and configure Wordpress as below.
Select English and click on "Next" button

Click on "Lets go!" and it will redirect you to the next configuration page.

Enter database name, username, password , database host and table prefix.
Use default configuration.
database name- mysql
username- root
Leave password blank
database host- localhost
table prefix- wp_
Fill as above given and click on "Submit" button.

Click on "Run the install".

Enter the Site title, username, password, email etc as below.
Site title- Enter any title like test etc.
Username- choose any username.
Password- use and password with uppercase and numeric fields.
Note- this username and password will use for wp-admin
Then click on "Run Install" button.

And you are finished with the wordpress configuration on XAMPP.
use http://localhost or local IP for your site.
user http://localhost/wordpress/wp-admin for any changes in WP-Admin panel.
:- Post your comments below if you find this helpful.👎👎


good Configurations.
ReplyDelete