You can redirect a URL in IIS without any code. Suppose if you have site www.test.com and you want that all traffic coming from www.test.com should forward on www.example.com, in this situation you can use IIS forwarding.
Or you want to redirect from HTTP to HTTPS then also you can follow the same instructions.
Follow below steps for IIS redirect or forwarding.
WINDOWS SERVER 2012 OR WINDOWS SERVER 2012 R2
1. On the taskbar, click Server Manager.2. In Server Manager, click the Manage menu, and then click Add Roles and Features.
3. In the Add Roles and Features wizard, click Next.
4. Select the installation type and click Next.
5. Select the destination server and click Next.
6. On the Server Roles page, expand Web Server (IIS), expand Web Server, expand Common HTTP Features, and then select HTTP Redirection. Click Next.
7. On the Select features page, click Next.
8. On the Confirm installation selections page, click Install.
9. On the Results page, click Close.
WINDOWS 8 OR WINDOWS 8.1
1. On the Start screen, move the pointer all the way to the lower left corner, right-click the Start button, and then click Control Panel.2. In Control Panel, click Programs and Features, and then click Turn Windows features on or off.
3. Expand Internet Information Services, expand World Wide Web Services, expand Common HTTP Features, and then select HTTP Redirection.
4. Click OK.
5. Click Close.
WINDOWS SERVER 2008 OR WINDOWS SERVER 2008 R2
1. On the taskbar, click Start, point to Administrative Tools, and then click Server Manager.2. In the Server Manager hierarchy pane, expand Roles, and then click Web Server (IIS).
3. In the Web Server (IIS) pane, scroll to the Role Services section, and then click Add Role Services.
4. On the Select Role Services page of the Add Role Services Wizard, expand Common Http Features, select HTTP Redirection, and then click Next.
5. On the Confirm Installation Selections page, click Install.
6. On the Results page, click Close.
WINDOWS VISTA OR WINDOWS 7
1. On the taskbar, click Start, and then click Control Panel.2. In Control Panel, click Programs and Features, and then click Turn Windows Features on or off.
Expand Internet Information Services, then World Wide Web Services, then Common Http Features.
Select HTTP Redirection, and then click OK.
Now ADD AN HTTP REDIRECT RULE TO A WEB SITE OR APPLICATION
1. Open Internet Information Services (IIS) Manager:
If you are using Windows Server 2012 or Windows Server 2012 R2:
- On the taskbar, click Server Manager, click Tools, and then click Internet Information Services (IIS) Manager.
- Hold down the Windows key, press the letter X, and then click Control Panel.
- Click Administrative Tools, and then double-click Internet Information Services (IIS) Manager.
If you are using Windows Server 2008 or Windows Server 2008 R2:
- On the taskbar, click Start, point to Administrative Tools, and then click Internet Information Services (IIS) Manager.
If you are using Windows Vista or Windows 7:
- On the taskbar, click Start, and then click Control Panel.
- Double-click Administrative Tools, and then double-click Internet Information Services (IIS) Manager.
2. In the Connections pane, expand the server name, expand Sites, and then navigate to the Web site or application that you want to configure custom error pages for.
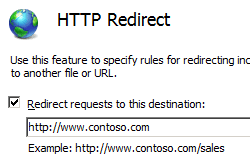
3. In the Home pane, double-click HTTP Redirect.
4. In the HTTP Redirect pane, check the box to redirect requests and enter the destination URL.
5. You can optionally specify any of the following options:
- Configure the redirection destination to be the exact destination as entered.
- Configure the redirection destination to be limited to the destination URL's root folder, not subfolders.
- Configure the HTTP status code, which can be one of these three options:
- 301 Permanent
- 302 Found
- 307 Temporary
- 308 Permanent Redirect
Note: IIS 7 will respectively return the following actual HTTP response statuses for each of the above options:
- HTTP/1.1 301 Moved Permanently
- HTTP/1.1 302 Redirect
- HTTP/1.1 307 Redirect
- HTTP 1.1 308 Redirected Permanently
6. When you have finished all the above changes, click Apply in the Tasks pane.


No comments:
Post a Comment